Showing posts with label Local Tourism. Show all posts

Sunday, August 30, 2020

Photography Article Fall Round Up|Photography Artist Statement

Just in time for Thanksgiving, it's the Fall Round Up: your one-stop spot for a look back at this fall's posts. Catch up on the previous round ups here:Spring and Summer.

Yes, Go Chasing Waterfalls

Musings:

  • Photography Is ... What is photography for you? Some thoughts about the importance of timing, patience, and luck.
  • Boost Your Photography: Set a Goal or Challenge - Learn how setting, reviewing, and revising a photography goal or challenge can help move you forward in your photography.
  • Photography Gifts for the Holidays and Where to Order Holiday Photography Gifts - Put your photography to good use this holiday season. Read about the wide variety of ways you can use your images to create memorable gifts for friends and family.
A collage mug is one of many ways you can use your photography for gifts.

For Beginners:

Explanations and overviews geared towards those wanting to get more out of their photography. Many of the 'Tips and Tricks' and 'Inspired Ideas' are also applicable.

  • Aperture and the F-Stop Conundrum - Confused about aperture? This article is the place to start. The rest of this mini-series divides the aperture section into three:What an Aperture of F/1.8 Can Do for You,The Middle Range Apertures: f/8 and f/11, andWhat an Aperture of F/22 Can Do for You.
  • Camera Lenses: What's In a Name? - An overview of camera lens naming conventions and what you need to know when looking for a new lens,Learn Your Lens: the lens itself - All about the functions and features of a lens, and Learn Your Lens: the accessories - Learn which camera lens accessories you need and how to use them.
  • Yes, You Need a 50 mm Lens - Find out why a 50 mm lens is a great upgrade, especially from your kit lens(es), and it's a great steal, priced around $100.
Comparison of changing apertures from the wide, middle, and narrow ends of the spectrum.

Tips and Tricks:

Advice for getting the most of your camera and photography

  • Zooming vs. Cropping: perspective in photography - Understand the differences between zooming vs. your lens, cropping afterwards, and the importance of changing your perspective.
  • Easy Photography Upgrade: get a remote shutter release - Around $6 for a remote can make a big impact in your photography.
  • Shoot a Successful Self-Portrait - Learn how to shoot a better selfie: how to focus and set the scene as well as a variety of ideas to try.
  • Improve your Fall Photography: use a polarizer - Get those blue skies you've always wanted. Learn how to use a circular polarizer.
  • Panning in Photography - Learn how to create panning shots with a frozen main subject and moving background.
  • Thankful ... for Food Photography - A collection of tips and tricks for improving your food photography shots.

Inspired Ideas:

How to make the shot with specific photography ideas

  • 50th Post and Six Month Blogoversary - Count down the Top 5 Most-Viewed Posts of the first 50
  • Make the Shot: Slow Sync Photography - Get a behind-the-scenes explanation of how to create your own ghostly images using the slow sync function of your on-camera flash.
  • Yes, Go Chasing Waterfalls - Suggestions and advice for what to bring and how best to shoot waterfalls with that long, silky water look.
  • Local Tourism: Photograph the Harvest - Find photographic inspiration in your local harvest. Visit a pick-your-own orchard or pumpkin patch.

Travel Photography

  • Photography Collections: start a collection - Consider a collage as a way to display travel memories. Unify your collage by focusing on a specific item or element, like full doors, door knobs, or even hearts.
  • Window on the World - Windows are a unique way of placing the viewer within the frame of your photograph. Consider paying attention to windows when you travel.

Stay Connected:

Don't miss a single post from Boost Your Photography

  • Follow along onFacebook -www.facebook.com/BoostYourPhotography.
  • Follow along onGoogle+ -Boost Your Photography on Google+ (or click the 'Follow' button near the top of the right-hand column.)
  • Follow along onTwitter -@archaeofrog .
  • Sign up to receive each new post by email. (The subscription box is in the right-hand column. Email addresses will never be sold or distributed.)
  • Subscribe using your favorite RSS reader. (Click the 'subscribe now' button in the right-hand column or typewww.boostyourphotography.com into your RSS reader.)

Thursday, August 13, 2020

Photography Article Capture a Day in a Single Image|Photography Artist Statement

Looking for an incredible manner to capture a favorite area or view? What about placing together a college of all of the changes in mild and climate across a unmarried day? This submit will discover how great to go about growing a memorable unmarried-day image like the one under.

(An apart: in case you neglected them, you may test out my photographs from this week's eclipse on Facebook:https://www.Facebook.Com/BoostYourPhotography .)

Photograph a Day in a Single Image | Boost Your Photography
Image to be had for buy.

Preparing for the Day

The first step is to choose an appropriate composition. Think about a location that will be impacted by both the rising and setting sun and one that will highlight the various transitions of the sun and sky throughout the day. You also want to choose a location that is easily accessible for you. The more times that you can visit and photograph the location through the day, the more options (and more potential slices) you will have to choose from.

As far as equipment, I strongly endorse the usage of a tripod for those sort of pictures. A tripod will allow you to set up in approximately the identical place and height each time, if you want to make it notably less difficult to create the final merged picture. (Read here How to Maximize Your Tripod.)

When I shot the collection of pics for the cityscape, above, I used the "high-tech" method of laying down a chain of 'x marks the spot' sticks at the precise place of every leg of my tripod. Since I turned into taking pictures in a town park, this seemed like an smooth and unobtrusive manner of understanding precisely wherein to put my tripod each time I came returned to shoot during the day.

Don't have a tripod? Just mark where you stood after which shoot from eye level. The series of 3 shots above have been accomplished free-hand using my point-and-shoot digital camera.

How to Photograph a Series of Day Shots

Once you have your location chosen, you will want to stake out a good day to take the photographs. Watch the weather, and find a day that will fit well with your schedule. Days with some cloud cover are ideal, as clouds add an extra dynamic to landscape shots. You want to arrive on location and set up before or during sunrise to get the earliest shots for your series. Consider using a program like The Photographer's Ephemeris to plot out exact sunrise and sunset times and locations.

The settings you use will in the long run rely upon your scene and scenario. I knew that with these landscape-fashion pictures I desired to maximise the intensity of subject. Because I become using a tripod for all shots, it additionally did no longer be counted how long the shutter pace had to be. So, I chose to shoot the bulk of those photographs in Aperture Priority Mode (A or Av) at f/22 and ISO a hundred. I also shot the use of Exposure Compensation and bracketing at plus-and-minus one forestall so that it will get a variety of lighter and darker variations of each composition. (Questions approximately any of those settings? Read more approximately Aperture and the F/Stop Conundrum or All about Exposure or Troubleshooting Your Exposure.) The wooded area collection was shot with my factor-and-shoot the usage of Program mode at ISO a hundred and letting the camera choose the settings.

As stated already, I used a sequence of sticks to mark out the precise area of my tripod, in order that I ought to be sure of shooting the equal composition whenever. After taking pictures the huge view of the scene (as used for the opening picture), I additionally zoomed in and shot a 9-shot landscape model of the scene, to capture greater element and record more pixels for capability large prints.

Return as often as possible for the duration of the day to picture your scene. As it gets in the direction of nighttime, plan on staying around and capturing the sunset, twilight, and night photographs all together. There is best about twenty minutes of elapsed time between the last two shots of my cityscape, for instance. (Switch to Tungsten white balance on your deep night pictures to clearly accentuate the blues.)

Post-Processing: Creating the Collage

The final step is choosing your series of favorite shots and assembling the collage. The instructions below rely on Adobe Photoshop, but other collage programs or apps could also work.

First, select the entire series of photographs that you are planning to use, and copy and paste them into the same file. Then, select all of the photographs and choose the Edit -> Auto Align Layers option. I use the Auto setting. This will align all of the photographs together, eliminating any differences from your aim, composition, etc.

Auto-Aligning Layers in Photoshop | Boost Your Photography
Auto-Aligning the Layers will leave gaps alongside the rims in which individual pix do now not overlap.

Use the crop device to create your very last composition. (Generally, aligning the layers will suggest that there are actually a few gaps alongside the edges of certain images.) Think approximately the factor ratio of your very last shot earlier than you crop: do you want to preserve it as a 4x6 or an 8x10 or widescreen? (Read greater approximately Aspect Ratio: Know Before You Crop.) For the model proven, I cropped to a 2:3 aspect ratio (4x6) but additionally did every other version with a widescreen (1:2.35) thing ratio.

Now you need to decide which portion of which picture to use as part of the final composition. Use guides to divide your composition into equal slices (or not, if you prefer). Then, click to select the top-most layer. Go to Layer -> Layer Mask -> Reveal All. This will add an all-white layer mask next to this layer. Now, use the select tool to select the sections of this image that you do not want to show.

The selected part of the image will have a black layer masks brought to hide it from view.

Click to select the layer masks, and then use the paint bucket tool to paint the choice black. This will cover that part of the image from view. Repeat this process of including a layer mask and choosing handiest the desired phase of every of the images. Then you will have your very last photo - a university across the day inclusive of a slice for every image!

Final composition displaying Layers Palette with black and white layer mask.

There you have it!  What will you photograph and create?  Share a link in the comments below!

Want greater superb thoughts? Follow Boost Your Photography on Pinterest: Boost Your Photography

Friday, August 7, 2020

Photography Article A Year Ago on Boost Your Photography|Photography Artist Statement

2013:

  • Light Painting: How to Spin an Orb. This article walks you step-by-step through the process of spinning and creating orbs with light painting. All you need is a bright LED light, a tripod for your camera, and a little bit of practice. You'll be surprised at how easy these are to do!

  • Travel Photography Must Haves. Don't leave for your next summer trip without making sure you have all the travel photography supplies you need! This quick article will get you started with all the basics for bringing back home amazing travel photographs.

  • Be a Local Tourist: Photograph a Farmers' Market. Photography opportunities are all around you. Take a trip to your local Farmers' Market to discover a wealth of photographic options. Practice your street or travel photography, zoom in on some curious details, or just wait for inspiration to strike!

  • Remember the Background and Move Your Feet. This article focuses on an oft-forgot point of composition: the background. Rather than getting sucked into your subject, take the time to pay attention to the background and see how moving your motion or perspective can make an immediate impact.

Don't Miss a Single Post from Boost Your Photography

Follow alongside on Facebook

Follow alongside on Google

Follow alongside on Twitter

Follow along on Pinterest

Follow alongside on Bloglovin'

Or, better but, receive updates every day or weekly thru electronic mail. Sign up below!

* indicates required

How might you want to acquire updates? *

Monday, July 27, 2020

Photography Article Capture the Season: Rephotography|Photography Artist Statement

Spring is slowly reaching us here in the Upper Midwest, although this week is much more full of April showers than any sign of May flowers. The changing of the seasons is an excellent time to start thinking about a long-term photography project. A seasonal collage of pictures is a great way to celebrate a favorite scene or a special spot.

Springtime Oak Tree with Fog

The first step is to choose a spot that would lend itself well to a rephotography project, and there are a few guidelines to keep in mind. You want to choose a view that will demonstrate the full range of seasonal variation. A deciduous tree is an ideal subject, but you should also consider the foreground and background of the image. Fields or forests or gardens can also emphasize the seasonal progression and add interest. Even a cityscape can offer seasonal interest, if you frame it well.

Second, accessibility is important. You want to choose a location that is easy for you to get to during all seasons of the year and, ideally, one that is fairly close by. The more often you can visit and photograph the spot, the better range of images you will have to choose from.

Third, you need to standardize your composition. This type of project works best if you can exactly match your positioning and composition across all images. Think about using physical clues in the landscape to remind you where you took each shot or what was near the edges of the frame. Keep in mind that you want to use markers that you can rely on even in winter.

Rephotography: Seasonal Collage of an Oak Tree | Boost Your Photography
Rephotography Collage of an Oak Tree

Four Seasons Collage on Flickr by Archaeofrog

This collage was one result of my first year of doing a 365 project (taking a picture a day for a full year). The composition is a bit deceptive, as this oak tree is actually on the playground of the school where I work, which made for a very accessible location. I was initially drawn to the stature and presence of the tree alone, but the inclusion of the grass in the foreground and the natural area in the background really helped emphasize the seasonal differences.

Finally, it was relatively easy to standardize the composition. This is the view out the emergency exit door in the stairwell. Because it is a narrow window, I could ensure that I was standing in approximately the same position each time. I also chose not to use the zoom on my digital point-and-shoot camera, so that the view of the composition would be the same.

Timing is important, as the right sky or the right lighting can really make or break this kind of composition. Because I chose a location I saw on a daily basis, I had many opportunities to capture an iconic composition that I felt represented each season. I loved the early morning fog of the ‘spring’ image compared to the bright blue sky for ‘fall.’ The image below was taken during a snowstorm in the middle of the day. The light above the doorway lit the speeding snowflakes, causing the motion trails.

Winter with Falling Snow

Snow Motion Blur on Flickr by Archaeofrog There are many variations of this idea too. Some photographers try to take their pictures at the same time of day each time, while others try to take a picture every single day. For the month of October in 2012, I took a photograph of this view nearly every school day and created the following video composite of more than 20 such images. I find it amazing how much variation was captured in such a short span of time.

Animated GIF of the same tree daily during October 2012
Do you have a location in mind? Get out there and start playing around with your composition and your placement, and you’ll be surprised at what you’ll be able to capture!

Saturday, July 25, 2020

Photography Article Shoot the Moon with the Photographer's Ephemeris|Photography Artist Statement

The moon has lengthy been a favorite situation of photographers. This article will give an explanation for the way to boost the bar on your moon photography by means of the use of a unfastened and simple device: the Photographer?S Ephemeris.

The moon rising vibrant over Lake Mendota in Madison, Wisconsin

Moon Rise over Mendota with the aid of Archaeofrog on Flickr The Photographer?S Ephemeris is a program that gives you with the timing and relative places for dawn, sunset, moon upward push, and moon set. What makes it a useful resource, however, is its mapping feature. You input a location, and the map overlays the path of each event (dawn, sundown, moon upward thrust, and moon set). You can then circulate round your reference point to determine the satisfactory vicinity to obtain a certain image.

Let me give an explanation for with an example. I live in Madison, Wisconsin, and one among my bucket list shots has been to photo the overall moon rising above the town skyline, presenting the glowing dome of our country capitol building. There are several parks and public regions around the lake close to the Capitol, from which I ought to shoot the skyline. Using the Photographer?S Ephemeris (Windows version), I turned into able to flow the reference factor around until the angle of the moon upward thrust aligned directly with the Capitol.

The narrow peninsula pictured within the map is a local park that offers numerous one-of-a-kind unobstructed locations for viewing the skyline across the lake. Using the information from the Photographer?S Ephemeris, I become capable of be set-up, on place and geared up to go, understanding exactly whilst and in which the moon might upward push.

Above: display screen shot of the PC version of the Photographer's Ephemeris displaying Madison, Wisconsin.

Below:Full moon upward push in opposition to the Madison skyline and Capitol by way of Archaeofrog. Available for purchase.

The narrow peninsula pictured within the map is a local park that offers numerous one-of-a-kind unobstructed locations for viewing the skyline across the lake. Using the information from the Photographer?S Ephemeris, I become capable of be set-up, on place and geared up to go, understanding exactly whilst and in which the moon might upward push.

Once the moon began to come back up, I found out that I would want to transport a touch bit further west backtrack the peninsula to get the moon even towards the Capitol dome. However, I became stymied through the timber alongside the manner, as there was no unobstructed location to get the alignment precisely as I wanted.

Full moon upward thrust over the Madison Capitol

Madison Capitol Moon Rise by using Archaeofrog on Flickr I was very happy with the close to-Capitol results that I received, however I will sincerely maintain to try once more round every complete moon. The relative angle of the moon upward thrust shifts dramatically thru the direction of the year, so an alignment that worked one month won't for any other. That is what makes the Photographer?S Ephemeris one of these useful and handy tool.

The Photographer?S Ephemeris is likewise extraordinarily available when travelling, permitting you to exactly pinpoint locations to get dramatic sunrises, sunsets, moon rises, or moon units towards an great backdrop, architecture, or surroundings.

Full moon upward push over Yellowstone Lake, Yellowstone National Park

Moon Rise over Yellowstone Lake through Archaeofrog on Flickr The Photographer?S Ephemeris is available for a huge type of structures. The domestic pc (Windows and Mac) variations are a free down load, and cellular variations are available on iTunes ($8.99) and Android ($4.99). I notably recommend downloading and trying this system for your laptop first, after which buying the app to your Smartphone or tablet in case you locate it beneficial.

Thursday, July 23, 2020

Photography Article Be a Local Tourist: Photograph a Farmers' Market|Photography Artist Statement

Memorial Day weekend inside the US marks the unofficial start of summer season, a time when many photographers? Minds turn to mind of tour. But you don?T want to travel to a new area to practice your travel images. There are endless opportunities on your very own metropolis.

The Dane County Farmers' Market takes location across the State Capitol

Farmers' Markets

A summer time-Saturday culture in Madison is the Farmers? Market, in which local farmers, producers, and crafters crowd the square across the Capitol building to promote their wares. This practice follows from conventional European markets while farmers would convey their goods into the cities for sale. The most important Madison Farmers? Market became hooked up inside the early Nineteen Seventies and is now the biggest producers-most effective farmers? Market inside the country (as a minimum in keeping with their internet site). The concept is so famous that dozens of smaller markets can be discovered in and around the city on any given weekend. The quality a part of my Saturday is the two block walk to the community Farmers? Market and the tasty Danishes that await me!

Celebrating the first Danish of the season with marketplace within the heritage.

Danish by Archaeofrog on Flickr Play with Patterns

Farmers? Markets are an notable place to play with styles. Fruits, greens, and vegetation all offer opportunities and may be as compared and contrasted in exciting and surprising methods. Practice filling the frame with simply one among a given object and spot what results you may locate. Or, search for in which special gadgets are positioned together and see what sort of compositions you can create.

Stacks of asparagus make a beehive sample.

Asparagus Pattern by Archaeofrog on Flickr

A panoply of pumpkins

Pumpkin Patterns by Archaeofrog on Flickr Street Photography

Farmers? Markets are also a exquisite venue for street pictures, as you will discover many people interacting, exploring, and taking part in what the marketplace has to provide. Also, don?T neglect the companies! Screw up your courage and ask if you may take an environmental portrait ? You may capture a sturdy experience of the person in addition to their environment. Or shoot from the hip and spot what you're able to perform.

An environmental portrait of a seller and his products

Vendor in the Rain by Archaeofrog on Flickr Don’t Forget the Details

Farmers’ Markets offer an abundance of produce and products that also lend themselves well to macro or close-up photography.  (A series of earlier posts offers suggestions about inexpensive ways to achieve near marco-level effects without investing in an expensive macro lens.) While the photograph below is not quite to that level of detail, I did want to focus in an emphasize the details in the sugar crystals atop the amazing muffins.

Close Encounters of the Muffin-Kind

Delicious Muffins by Archaeofrog on Flickr Make a Statement

Be positive to additionally positioned the digital camera down and spend some time looking at. What draws your attention? Is it colorations, crowds, interactions, movement, scrumptious smells? Think approximately how quality to bring that issue of the Farmers? Market for your photography.

For me, considering I so rarely visit the downtown market, what strikes me right away is the crowds. There is the sort of consistent hustle and bustle of humans continuously in motion. But at the equal time, there's a extraordinary, agreed-upon order to the chaos. No count number when you visit this specific Farmers? Market, the crowds will constantly pass in a counterclockwise sample. There could be a steady ebb-and-drift as human beings pass in closer to the stands they may be interested by, but they may always return out to the broader counterclockwise path.

Farmers' Market in movement

Movement on the Market by using Archaeofrog on Flickr

In the image above, I wanted to capture that feeling of motion and pattern. I had delivered my DSLR however did not have my tripod or any unique filters with me. So, I improvised through the usage of a nearby bench to stabilize the camera and held my polarized shades in front of the lens to mimic a polarizing filter out. I changed into not able to sluggish down the shutter velocity as plenty as I might have favored, however you at least get some experience of movement from the blur of the crowds.

Conclusion: Be a Local Tourist

You do no longer should travel some distance from domestic to be a vacationer. Think about activities or happenings around your very own town and neighborhood that would offer photographic possibilities. Apply the equal talents and strategies that you might while travelling for your very own metropolis and surroundings. You is probably amazed at what you find!

Saturday, July 18, 2020

Photography Article Long Exposure Photography at the Fair(e)|Photography Artist Statement

The idea of being a ?Nearby tourist? Is a reminder which you don?T want to journey far to find some thing worth photographing ? Even if you?Re looking for some thing out-of-the-everyday. In an earlier submit I mentioned the opportunities of photographing a neighborhood Farmers? Market. This publish will provide tips and advice on how to have a laugh with long exposure pictures at the truthful(e).

Carnival Ride Long Exposure Photography Festival Ferris Wheel
Fairs and carnivals offer a wealth of photographic possibilities.

Long Exposure Carnival Rides via Archaeofrog on Flickr

Carnival rides are a staple of childhood memories of summer time, and they can be a photographic gold mine. Spend a little time looking, and also you might be amazed how smooth it's miles to find a nearby nation truthful, county honest, church carnival, track festival, or faculty fundraiser that offers carnival rides. While this put up will give attention to taking photos of rides at night time, such festivals and gala's also are wonderful possibilities for candid ?Street pictures,? Exceptional meals photographs, taking pictures performers, and many, many different varieties of photos.

Preparation: what to deliver

For shooting carnival rides at night time, you may need to have a strong tripod in addition for your digicam. (Read greater approximately the way to get the maximum from your tripod right here. Do not fear approximately the use of reflect lock up in this example, as you need on the way to shoot quick.) It additionally useful to have a far flung shutter launch on your digital camera. (I use this inexpensive corded shutter release from Amazon.) For lenses, you will want to bring a wide-perspective lens to capture wide views of complete rides, such as a kit 18-55 mm lens. Don?T forget about popular backup substances either like spare batteries, an extra reminiscence card, and a lens cloth or Lens Pen for cleaning. Keep in mind that gala's, festivals, and carnivals are regularly busy, crowded locations and that you want to maintain your equipment to a minimum.

Ferris Wheel at Night Long Exposure Photograph
Ferris Wheel at Night with the aid of Archaeofrog on Flickr

Preparation: timing it right

For long exposure night time pictures, the key element in making beautiful snap shots is the timing. Many photographers are acquainted with the time period ?Golden hour,? Which refers back to the duration simply after dawn and just before sundown whilst the shade of daylight takes on its traditional heat, golden tones. The ?Blue hour,? But, is a less famous term, and it refers to the period just earlier than dawn and just after sunset when the coloration of the sky takes on deep blue tones which are regularly more seen in pix than to the bare eye. It is the balance among these deep blues in the sky and the lighting fixtures from the carnival rides that makes for virtually memorable pictures.

Timing is critical in getting the proper look

The snap shots above display the importance of timing. The left-hand photo was taken 15 minutes earlier than sundown (ISO a hundred, f/22, and zero.6 seconds), whilst the right-hand photo changed into taken 10 mins after sunset (ISO one hundred, f/22, and a pair of seconds). In the earlier than sundown image, the brightness of the clouds and sky behind the experience diminishes the effect of the lighting fixtures and movement, even as inside the after sundown photo, the colours of the experience glow and really stand out. The picture underneath changed into taken any other 15 minutes later, whilst the blue hour changed into in complete swing (ISO a hundred, f/22, and 5 seconds).

Long exposure carnival ride during blue hour
Long Exposure Carnival Ride at some stage in the Blue Hour with the aid of Archaeofrog on Flickr

If you need to recognize about when the blue hour will occur in a given place, you could appearance up the sundown instances. The blue hour usually begins a little while after sundown and lasts until approximately an hour afterwards. Some websites, consisting of the Blue Hour Site, will let you put in a date and area, and it will offer greater precise hints approximately the timing of the blue hour.

Does that imply you have to plan to expose up and best shoot all through the blue hour? Of path not. I could recommend planning to reach at the least an hour or so early. This will provide you with time to stroll around and scope out locations. Think approximately angles with the intention to will let you capture the rides from an interesting factor-of-view or in relationship to each different. Also search for places where you could stand outdoor of the normal float of visitors to avoid absolutely everyone by accident going for walks into you or your tripod. (This is also an extraordinary excuse to ask a pal alongside for some pictures. Nothing maintains human beings from your manner like a set of or extra human beings with tripods.) Finally, be aware of in which other assets of light are placed. Bright street lights can grow to be megastar bursts at f/22 and add additional hobby for your picture.

This photograph changed into shot properly after the blue hour, however the black sky absolutely sets off the lighting.

Long Exposure Carnival Rides via Archaeofrog on Flickr

Shooting Long Exposure Fair Photography

If you have got a factor-and-shoot digital camera, you could shoot carnival rides at night using the ?Lengthy shutter? Or ?Night time pictures? Setting, which allows you to set a shutter speed of a second or longer. If you have a DSLR digicam, that is one of these instances while you will want to test with capturing in manual.

My process for taking pictures with my DSLR is as follows. First, determine the composition: installation the tripod, attach the digital camera and faraway securely, and test the view thru the viewfinder. Second, find a vibrant, seen, stationary a part of the journey and set the point of interest, then transfer the autofocus to off/guide recognition. (Particularly if a experience involves numerous motion, your autofocus might preserve converting its cognizance and now not take any photographs.) Third, if just beginning and there's still respectable light in the sky, turn the dial to Aperture Priority (AV) mode and set a narrow aperture, like f/22. Leave the ISO cost low, like one hundred. Let the digital camera set the shutter speed after which take a check picture.

Make the Shot: How to shoot long exposure photographs at the fair or carnival | Boost Your Photography
Here, I set the point of interest even as the ride was loading. Because this journey changed into swinging right at me, it'd have burdened the autofocus.

Now is while you need to make choices approximately what you want to perform. Switch into manual mode, and keep the ISO at 100 and aperture at f/22. If the sky or the lighting at the journey are too brilliant on your take a look at photo, pick out a slightly quicker shutter speed and take any other picture. If the sky or the lights on the experience are too dark, pick a slower shutter pace and take any other picture. Keep adjusting until you find a proper balance for the trip you're taking pictures; then shoot away. Because the mild will preserve converting swiftly, you'll want to keep watching your LCD display screen and changing your values consequently.

If you begin taking pictures at or around sundown, you can find that a shutter pace of 0.3 seconds gives an affordable publicity. By the time the blue hour rolls round, you will probable be capable of get shutter speeds of up to two or 3 seconds. As the blue hour deepens, you can hold lengthening your shutter pace in the direction of 5 or 8 seconds. If you hold capturing even later, you could discover that longer shutter speeds begin including too much blur that you lose man or woman lights and patterns. In that case, you could need to begin changing your aperture to a much broader price instead of continuing to growth your shutter speed.

Ideas and Variations

Those are the basics of capturing long publicity night photography of carnival rides. The a laugh is available in attempting out distinct angles and points-of-view and in seeing the results of various shutter speeds and apertures. Try getting up near below a experience to see how the view adjustments. Or attempt getting a longer methods back and lining up numerous rides to your composition. Take the time to study and then shoot a trip throughout its entire method. Many rides upward push up or sink down at the beginning and ending and along with this vertical exchange may also add greater hobby to your image.

This image turned into shot from immediately under the journey pictured above.

Long Exposure Fair Photography through Archaeofrog on Flickr

You should also do not forget less traditional techniques. See what takes place while you zoom your lens in or out while taking a picture or pan your camera side-to-aspect at the tripod whilst taking pictures. Take your digicam off the tripod entirely and notice what form of effects hand-preserving could have at a slow shutter velocity. If you discover a appropriate puddle, you can even get down low and play with puddle reflections too. (Read greater approximately the puddle mirrored image technique here.) Your simplest drawback is your creativeness.

Swing Ride Reflection by Archaeofrog on Flickr
Ferris Wheel Reflection by Archaeofrog on Flickr

Read more about the August Photography Book Club or join us on Flickr - Photography Book Club.

Friday, July 10, 2020

Photography Article Yes, Go Chasing Waterfalls|Photography Artist Statement

Waterfalls are a conventional photographic difficulty, and despite the TLC track, many photographers do spend day without work chasing waterfalls. With the right device and a little little bit of making plans, you may make the most out of your waterfall shots.

Take Your Waterfall Photographs to the Next Level | Boost Your Photography

Equipment for Waterfalls

Many waterfall photographs feature the long, slow, "cotton candy" looking water that can only be achieved by using a long exposure, on the order of full seconds to even minutes. In order to successfully capture this kind of shot, it helps to have a few extra supplies with you. (After each suggestion, I will offer some 'how to cope without' tips in the parentheses.)

1. Tripod. A tripod will hold your camera steady for a longer shutter speed and can help you get angles or views that might be difficult while hand-holding. Read more about How to Maximize your Tripod for advice on using a tripod effectively. (If you do not have a tripod with you, try resting your camera on something steady like the ground, a rock, or a railing.)

This wide view of a waterfall in Mount Rainier turned into shot via putting the digicam down on the bridge.

2. Remote Shutter Release. A far off allows you to trigger your digital camera's shutter without touching the digital camera. This minimizes digital camera shake and allows you capture a steady, sharp image. A far off shutter release additionally lets in you to apply the 'Bulb' setting on your digital camera to get shutter speeds longer than 30 seconds. Read more approximately why Remote Shutter Releases are a Cheap and Easy Upgrade. (If you do not have a faraway with you, use the two-2d or 10-2d timer to your digital camera.)

three. Circular Polarizer. A round polarizer allows with waterfalls in two methods. First, it reduces the quantity of mild getting into your camera by using one or two stops, which allows you to shoot with a slower shutter pace. Second, turning the polarizer permits you to most effective document mild bouncing off the water in place of through it, which maximizes the sluggish water impact. Read greater approximately how a Circular Polarizer will improve your pictures and the way first-class to use one right here. (If you do now not have a polarizer, you could try taking pictures thru polarized sun shades, but this can add an unusual coloration solid for your pics.)

Sunglasses can mimic the effect of a polarizer however often add a shade cast.

Four. Neutral Density Filter. A impartial density clear out (everyday or variable) permits you to lessen the amount of mild getting into your camera. A regular neutral density clear out will lessen the light by means of a fixed quantity of stops, even as a variable neutral density clear out will let you range the quantity of stops. The darker the clear out, the less light that reaches your digicam, and the longer you could depart the shutter open. (If you do no longer have a impartial density clear out, you will no longer be capable of get the surely lengthy, sluggish shutter speeds.)

Making the Most of Your Waterfall Shots

Shoot in Aperture Priority or Manual Mode

When shooting waterfalls and trying to get the long, slow water look, you want to get the slowest shutter speed you can while still keeping the overall shot exposed properly. To do this, you want to set your ISO to 100 (or the lowest value on your camera) and your aperture to f/22 (or higher if you have it). If you are shooting in aperture priority mode, the camera will then calculate the longest shutter speed that it can for the given ISO and aperture. If the picture comes out too light or too dark, switch over to manual, dial in the same settings, and adjust the shutter speed as needed.

If you are able to use a shutter velocity longer than 30-seconds (possibly in case you are the use of a round polarizer in combination with a impartial density clear out), then you'll want to use the 'Bulb' placing in guide mode. In Bulb, the digicam will go away the shutter open as long as you press the shutter button or maintain down the faraway. Using a faraway with a lock permits you to preserve the shutter open as long as needed to get the shot.
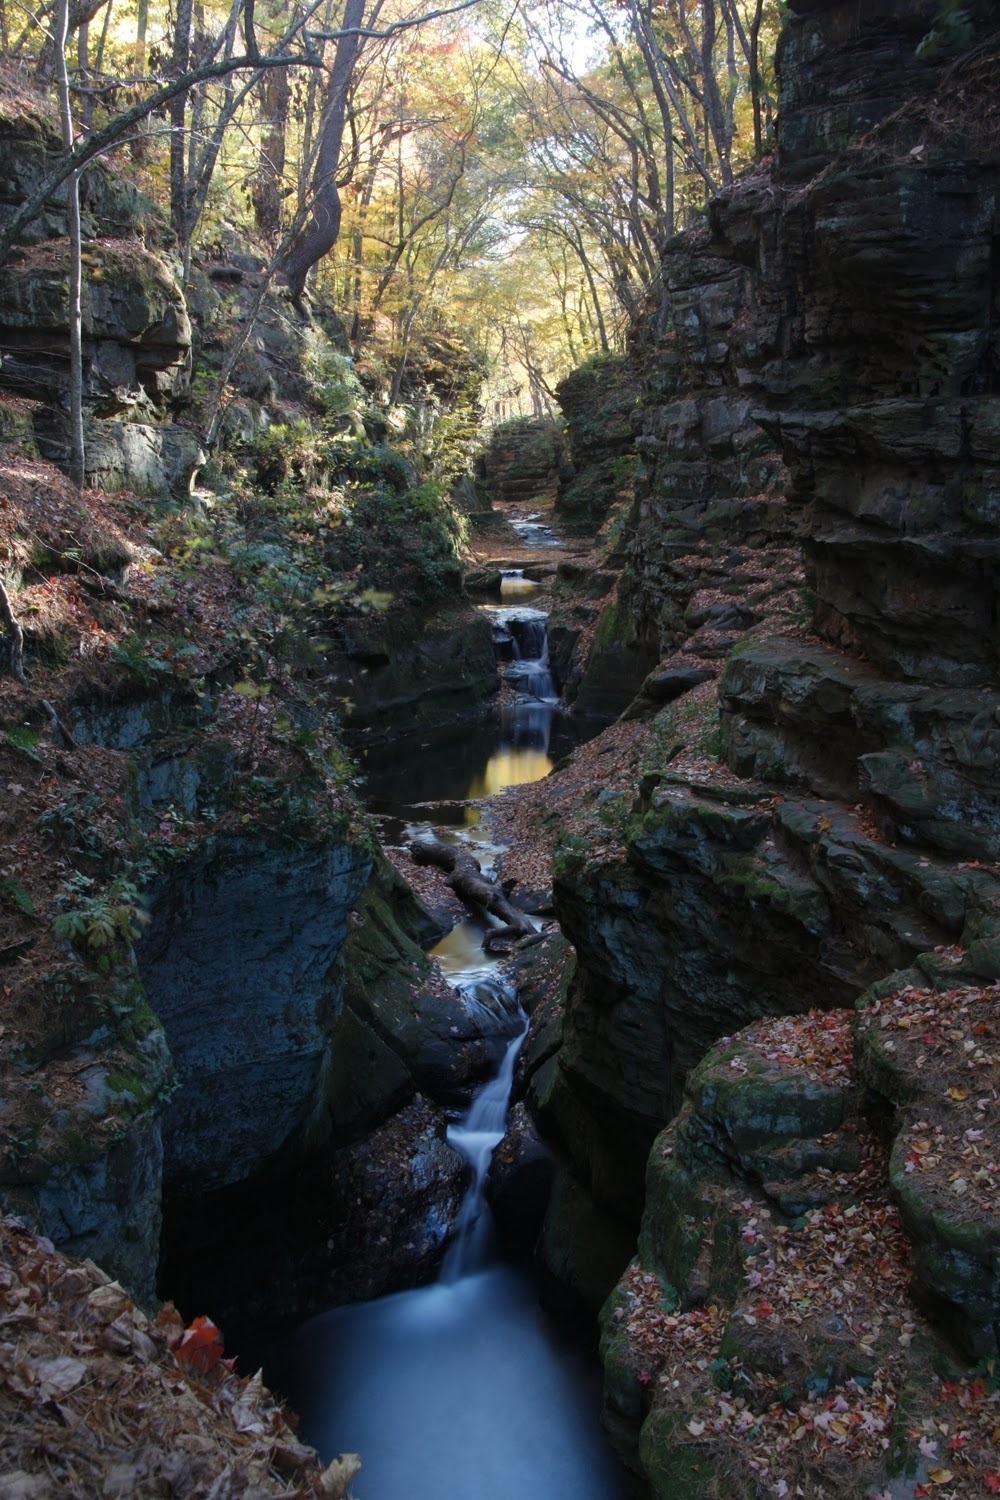
Gorge of Waterfalls by Archaeofrog. Available for purchase.

Aim for Even Lighting

Waterfalls look best when they are shot under even lighting: either the entire scene is in direct sun or in the shade. Dappled light can be very pretty in real life but makes it difficult to properly expose for your waterfall shot. In the shot below, you can see that the parts of the falls in direct sunlight are too bright, while the shady sections are still dark. Cloudy, overcast, or just entirely shaded falls work best, as the lighting is already a little lower, and you can use a longer shutter speed.

The bright sunlight spots make this waterfall photograph uneven.

Provide a Sense of Scale

Waterfalls vary greatly in size from small ripples through stones to powerful behemoths with thousands of gallons of water pouring over each minute. Think about providing your viewer with a sense of scale or context when composing your waterfall shot.

Waterfall at Mendenhall Glacier

This composition emphasizes the strength and scale of this waterfall in Juneau, Alaska. The falls itself fills the complete body, and on my own, the viewer would haven't any concept as to the scale of the falling water. The addition of the couple, however, affords that needed feel of scale, and shall we the viewer understand some of the immensity of this waterfall.

Vary your Perspective

Many people look at waterfalls, take a shot of then head on from the bottom of the falls or an overlook, and move on. This can be a very lovely shot, but there is so much more than you can do.

Waterfall in Fall through Archaeofrog. Available for buy.

The image above is a greater conventional view of a waterfall. While it looks as if this was shot head-on from the lowest of the falls, it changed into actually shot quite a distance away with a zoom lens. This become the center of a sequence of falls in a narrow canyon, however zooming in locations you, as the viewer, lots closer to the falls than is sincerely possible for that vicinity.

Leaves inside the Falls by Archaeofrog. Available for buy.

Get up close and private together with your waterfall! While now not cautioned for all falls (know your limits), getting physically very close to a waterfall can provide a few high-quality taking pictures possibilities. This small waterfall passed off to be proper subsequent to a reasonably dry financial institution that allowed me to get proper up to it with my tripod with out truly having to wade through the move.

Above the Falls by way of Archaeofrog. Available for purchase.

Looking down from above is every other manner to alternate your angle and get a distinctive waterfall shot. In this one, the point of interest is lots greater on the swirling leaves inside the history than at the real waterfall itself. Again, an extended shutter pace (60 seconds in this case) made the swirling pattern obvious.

Forget the Waterfall Entirely

Both of these next shots are untraditional versions of waterfalls shots: the falls itself is not even visible.

Serene Swirls through Archaeofrog. Available for buy.

In this shot, the focal point is on the swirling leaves and the narrow gorge this is the placing for the waterfall. This photograph was a aggregate of photographs, one for 15 seconds to show for the swirling leaves and water, and one for 5 seconds to show for the brightly lit historical past.

A Wide Look at Fall by using Archaeofrog. Available for buy.

This shot is off the water just above the waterfall. Here, the water continues to be and its reflect-like surface displays the scene around it. This mirrored image is handiest slightly disturbed by means of the ripples as the water tactics the falls. The leaves inside the foreground carry a huge-perspective feel to this image. The key to taking pictures a photo like this one is to get the digicam bodily down low to the water and to shoot with a huge-angle lens (despite the fact that 18 mm was the widest that I had right here).

Waterfall Summary

If you want to shoot waterfalls and want to achieve the long, slow moving water style, then it helps to be prepared. Bring along a tripod, remote, circular polarizer, and neutral density filter, so that you can get longer shutter speeds, such as 15 or 30 seconds or even up to full minutes. Think about the lighting and try to plan your visit for a time when the waterfall and surrounding scene will be in full shade (or full clouds or overcast). Once you are there, do not be satisfied with just getting the 'classic' waterfall shot. Take some time to vary your perspective and include a sense of scale. Consider even forgetting about the waterfall entirely for some shots. You may be surprised to find that your favorite shots are those where you took the time to try something new.

Waterfall in Motion with the aid of Archaeofrog. Available for buy.

Want greater exquisite ideas? Follow Boost Your Photography on Pinterest: Boost Your Photography